When I think of cookie pops, I think of these:
I worked at Millies Cookies a couple of years ago and these were the cookies of choice for children. Actually they were quite good and each one that was sold Millies donated some of the profit to the Childline charity!
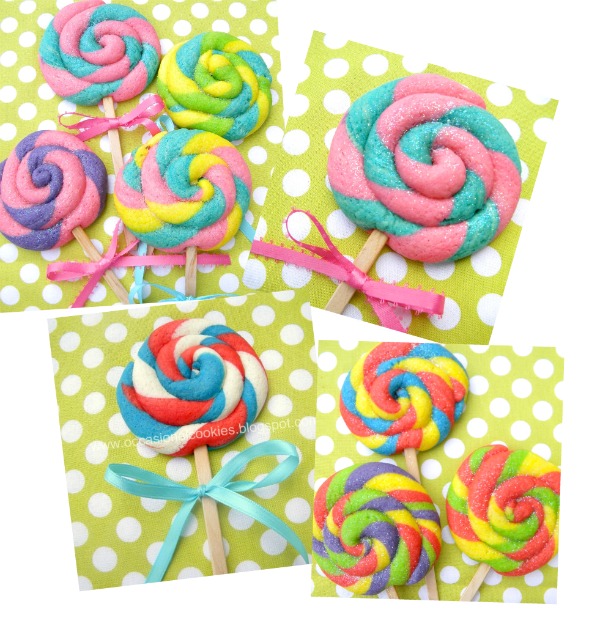
Anyway, this post is regarding a new cookie pop that I've seen around with unlimited colouring potential!
Halloween:
There are so many colour combos perfect for each occasion and are so cute!
These are quite similar to the Candy Cane Cookies.
- Sugar Cookie Dough (Your recipe choice)
- Food Colouring
- Lollipop Sticks (I prefer the white skinny sticks to the ice lolly sticks)
- Off Set Spatula
- Silicone Mat - to work on
- Parchment Paper
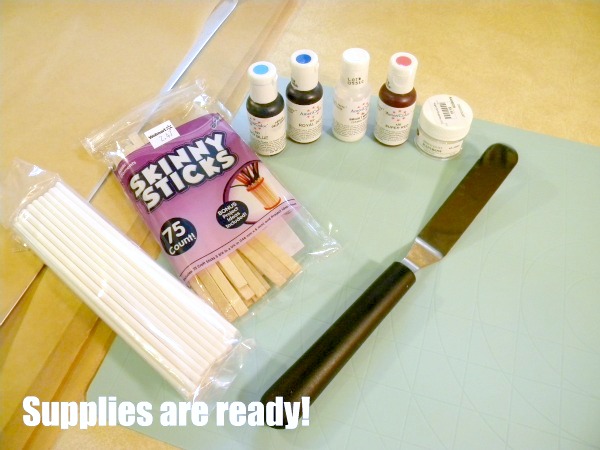
Directions:
Separate your dough into however many different colours you would like. Colour the dough with food colouring.You may need to add a little more flour as you go since you are adding a liquid colouring. You don't want the dough to be sticky, so just sprinkle flour in as needed. Start with about 5 drops of each colour and add as required.

Knead the colouring in with your hands. If you want to add more colour in, go for it!
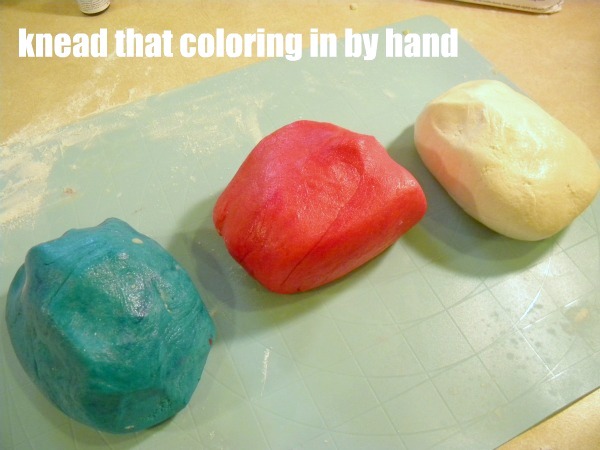
You can chill your dough for 30 minutes or so, but it’s not always necessary if it rolls out without sticking to your hands or mat.
Pinch off about a 1 inch piece from each piece of dough and roll into a 2 inch log between your hands. Stack the logs in a pyramid on your silicone mat. I don’t flour the surface. You want a little “traction” between the dough and mat as you are rolling it out. If your dough is too sticky add more flour or chill in fridge for 30 minutes or so.
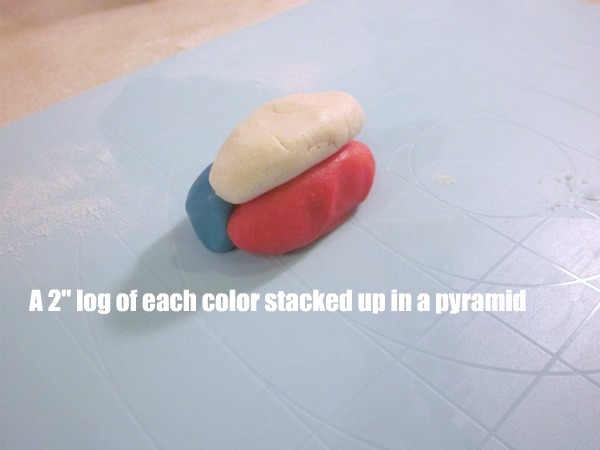
Start, with one hand, to roll the dough into a snake. Think back to your days of playdoh!
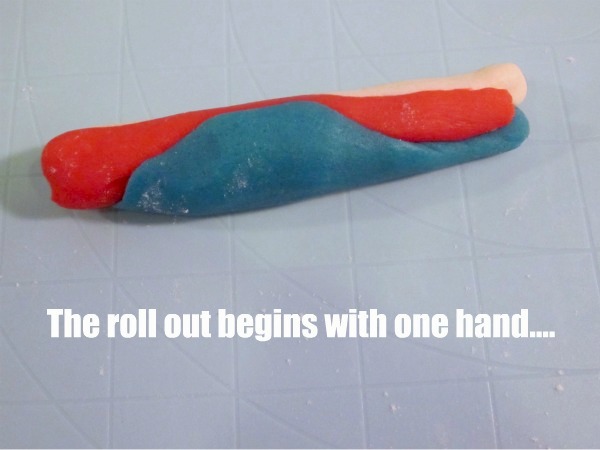
Eventually you will need both hands to roll out a 12-15 inch snake. Don’t let the snake get too thin, or you will have issues with breakage.

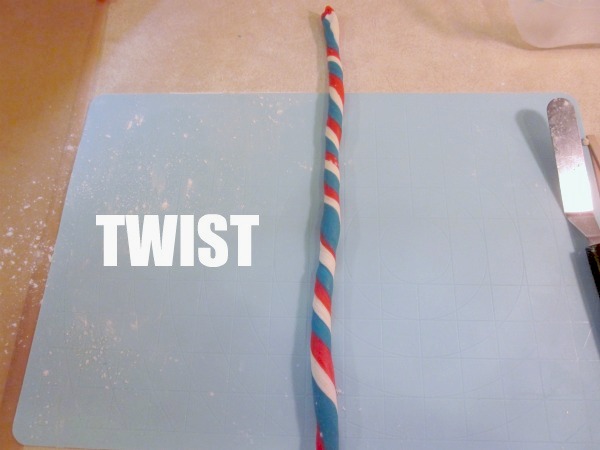
Now it’s time to twist the snake. I do this by rolling the right side up and the left side down. So my snake now is vertical.
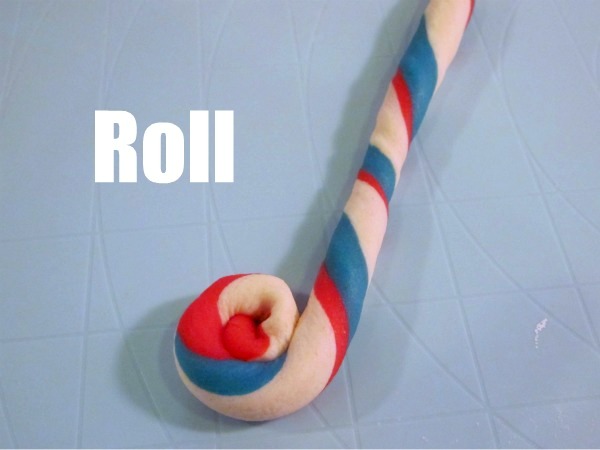
Coiling the snake. Start at the bottom and coil up. There is no need to press the sides together, they will bake together.
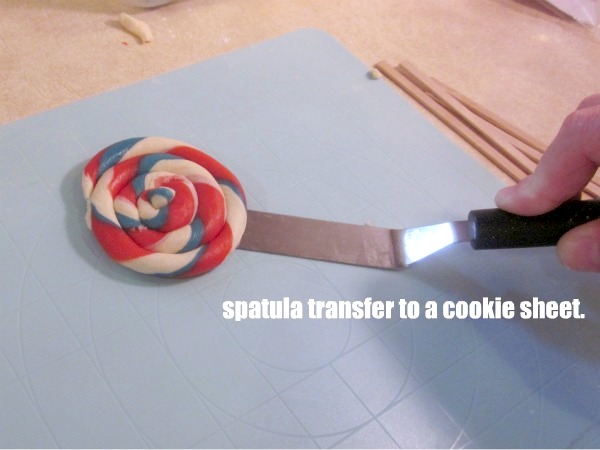
Use your offset spatula to transfer your coil to parchment lined cookie sheets.
When your sheet is full chill in the freezer for 5 minutes. You want to chill it just enough so that inserting your stick is easy and does not deform your coil. Insert your sticks. I push the stick about 3/4 of the way up.

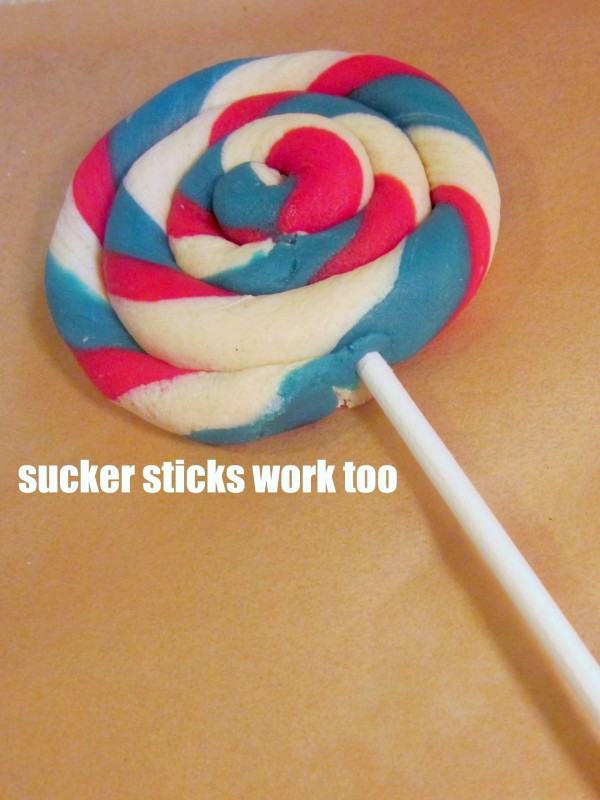
At this point you can also sprinkle on some sugar or disco dust. I like to take a pinch of rainbow disco dust and give a light dusting on each cookie. It really sparkles it up.
Bake them up. Make sure not to under bake. Let them cool completely. Wrap in a clear treat bag and tie with pretty ribbon. What a happy treat! I hope you have fun creating these. What a great cookie project for the little ones in your life too. The colour combinations are pretty endless.
Bake them up. Make sure not to under bake. Let them cool completely. Wrap in a clear treat bag and tie with pretty ribbon. What a happy treat! I hope you have fun creating these. What a great cookie project for the little ones in your life too. The colour combinations are pretty endless.
From:


No comments:
Post a Comment